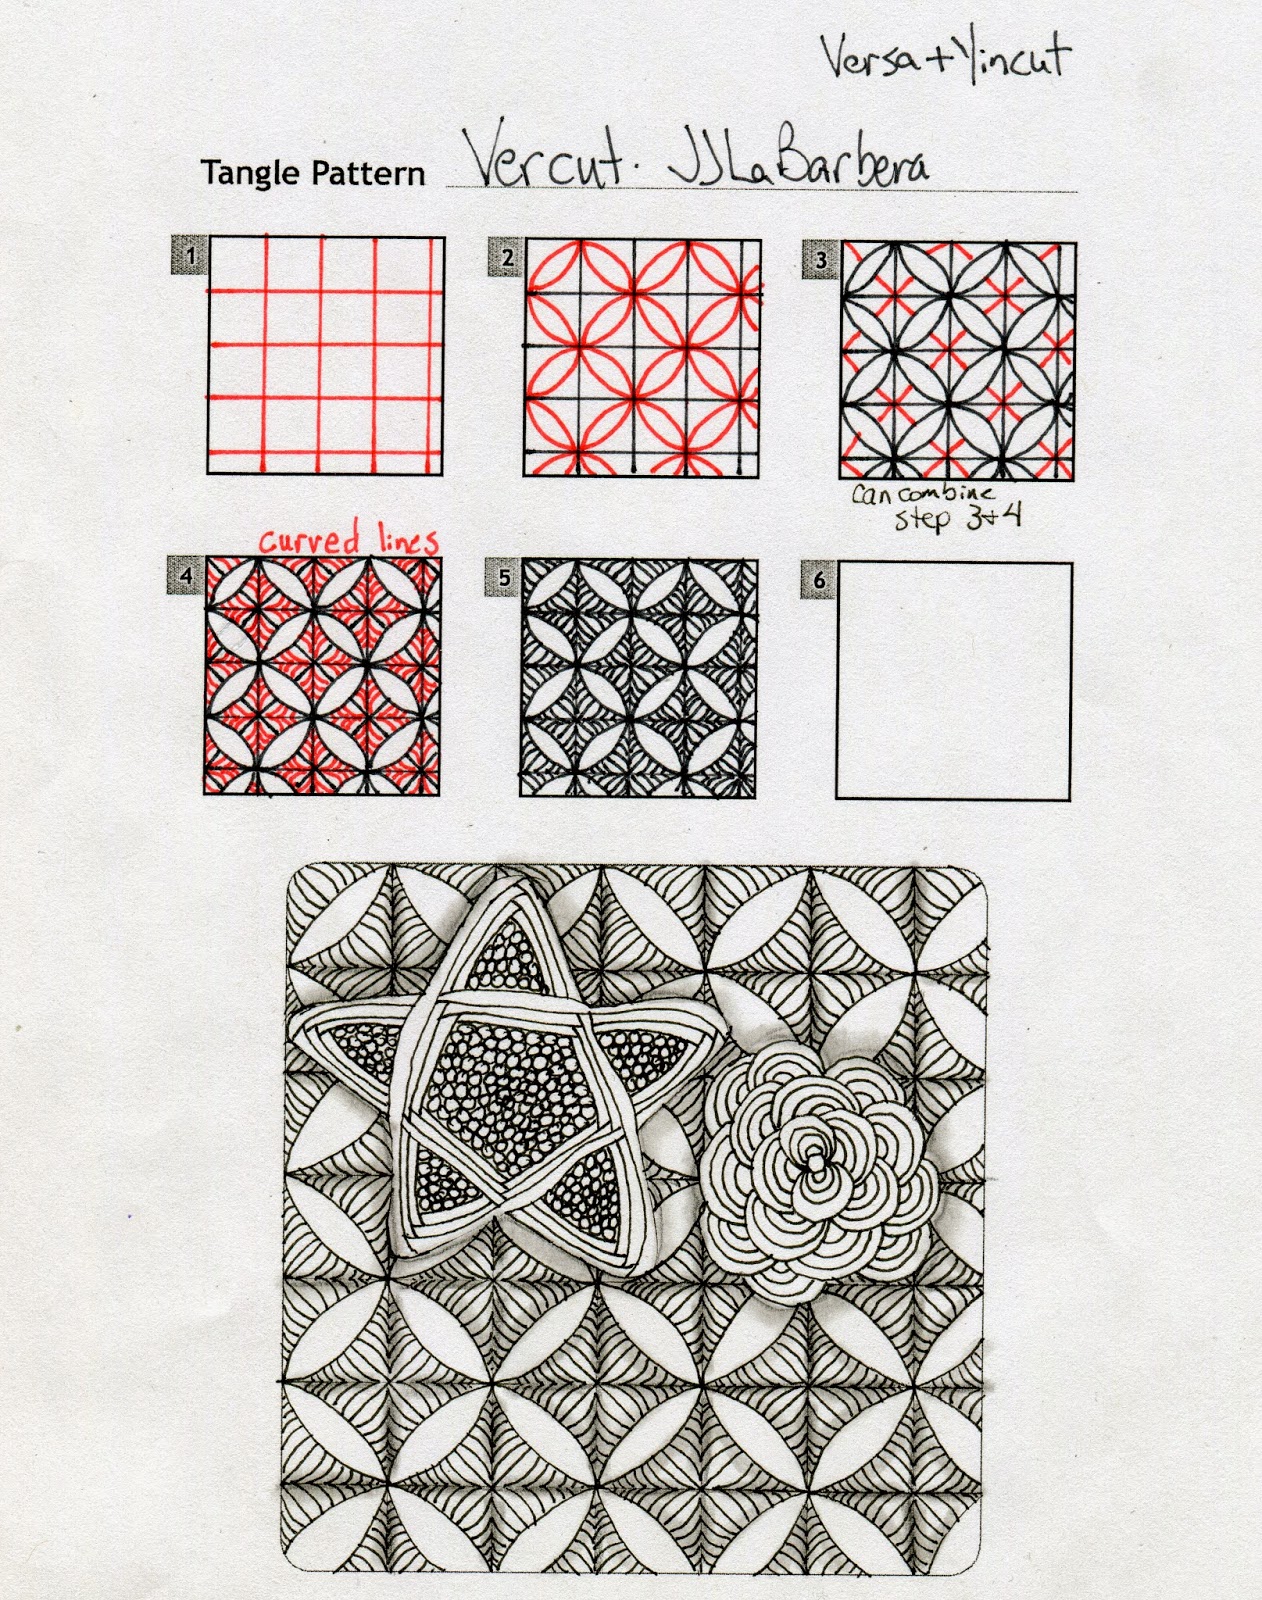
I am calling this pattern Vercut as it is a blending of Versa and Yincut. It really is quite simple to do and steps 3 and 4 can even be combined as you are going along. I did shading in the example, but as you can see in the box top, it looks nice without shading too.
Originally, I didn't create this as a grid pattern, well, I started with a dot grid. After I started drawing the design however, I realized that I was drawing the grid in as I did steps 3 and 4, so I went ahead and drew the grid.
I hope you like it, and again, please let me know if this design is already out there.


Like the pattern and like what you've been doing with boxes, fun to work on wood.
ReplyDeleteThanks!
DeleteI love this! This is the first of your blogs I've read, so I'm going to take some time to go over them all! I also just started a blog on here, but I'm not sure how to tell you what it is. Also, how do you get the buttons on the side of your blog? I tried to put the tanglepatterns.com one on but it wouldn't work. Can you help a fellow tangler out? haha thanks :)
ReplyDeleteMary, I got your email. I'll email you back.
DeleteJJ I like your Vercut very much and I have been practicing it. Question......what pattern is the background for Vercut done in the orange ink? Thank you for sharing your talents with us! Nancy
ReplyDeleteHi Nancy, If I understand your question correctly, the background is part of Vercut. It is the Yincut part of the design. I start with a straight line in the center going from the middle of the "petal" to the center of the square. I then use curved lines to fill from the straight line to the point where the petals meet. I hope that helps. You can also refer to Yincut, it might help. Thanks for checking out my blog!
ReplyDeleteI wonder if Nancy meant the background of the bottom image? I think it may be Garlic Clove, if that's what she's referring to.
ReplyDeleteGreat Tangles here! Thanks for sharing.